
Table of Contents
Introduction #
This SOP outlines the step-by-step process for using the Campaign Creation Automation Tool. This tool streamlines the campaign creation process for Amazon advertising, facilitating SKU mapping, campaign setup, and targeting strategies.
Prerequisites #
- Ensure that you have a valid license for the tool.
- Have your SKU list ready for mapping.
Process Overview #
Step 1: Tool Access #
- Open the Tool: Launch the Campaign Creation Automation Tool.
- License Validation: Upon opening, if your license is valid, a success message will pop up. Click the “OK” button to proceed.
- Dashboard Visibility: Once the tool is successfully opened, the main dashboard will display your tool’s validity details and an “IMPORT AUTOMATION” button.
Step 2: Import Automation #
- Click on “IMPORT AUTOMATION”: This action will reveal all relevant sheets needed for campaign creation.
Step 3: SKU Mapping #
- Navigate to SKU Mapping Sheet: Locate and open the sheet named “SKU MAPPING.”
- Columns Overview: The sheet contains three columns:
- Column 1: SKU Naming Structure
- Column 2: SKU as per Amazon
- Column 3: Category Tag
- Input SKUs:
- Paste your entire SKU list into Column 2.
- For each SKU, identify the category and input the corresponding short form in Column 3 (e.g., NWW for Night Wear for Women).
- Format SKU Naming: In Column 1, format the SKU names as follows:
- Remove spaces and replace them with “-” or “_”.
- Ensure names are unique and concise (max 3 words).
- Example: Change “Red shoes for school girls” to “Red_Shoes_School_Girls” or “RedShoesSchoolGirls”.
- One-Time Process: This mapping is a one-time setup; no need for future changes.
Step 4: Campaign Setup #
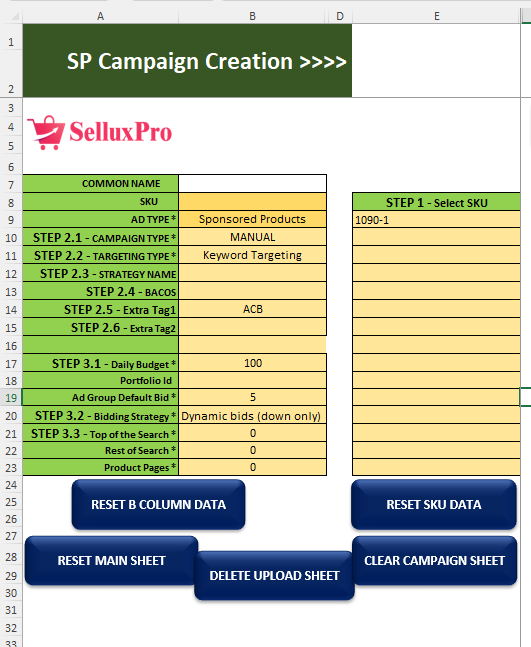
- Select SKUs for Advertising: Choose the SKU(s) you wish to advertise. You can select one or multiple SKUs.
- Common Name for Multiple SKUs: If you select multiple SKUs and the names are too long, assign a common name on the left side.
Step 4.1: Campaign Type Selection #
- Choose Automation Type:
- Decide whether to create a manual campaign or an auto campaign.
- Select Targeting Type:
- Choose between keyword targeting or product targeting.
Step 4.2: Keyword Targeting #
- Enter Strategy Name: Input a strategy name (e.g., H10, STR report).
- Specify Break Even ACOS: This helps in analyzing the campaign later.
- Add Extra Tags: If desired, input additional tags for the campaign naming structure.
Step 5: Budget and Bidding #
- Daily Budget: Specify the daily budget for the campaign.
- Select Bidding Strategy: Choose from:
- Dynamic Bid (Down Only)
- Dynamic Bids (Up and Down)
- Fixed Bid
- Specify Placement %: Determine the percentage for placements at the top of search, rest of search, and product pages.
Step 6: Keyword Campaign Creation #
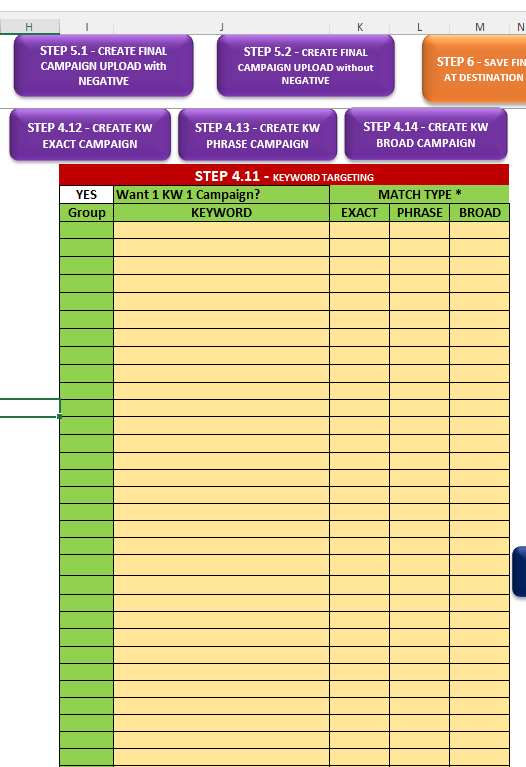
- Select Campaign Type:
- Decide if you want 1 campaign per keyword.
- Input Keywords:
- Paste keywords in Column J.
- Group keywords in Column I if necessary.
- Specify bid amounts in Columns K, L, and M for exact, phrase, and broad match types.
- Leave bid cells blank if you don’t wish to create a campaign for specific match types.
- Create Campaigns:
- Press the button to create campaigns for exact, phrase, or broad match types.
Step 7: Final Campaign Options #
- Negative Targeting Options:
- If you wish to create campaigns with negative targeting, proceed to Step 5.1.
- For campaigns without negative targeting, go to Step 5.2.
Step 8: Save and Upload #
- Save Upload Sheet: Save the completed upload sheet to your destination folder.
- Upload to Amazon: Press the Step 6 button to upload the sheet and start your campaigns.


